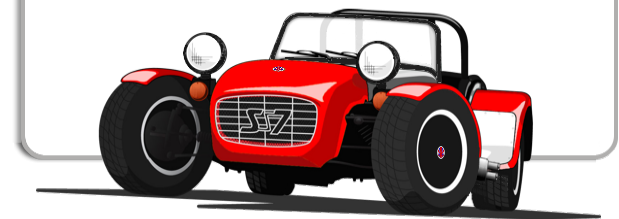
The 2017 Diary,
10 Year Anniversary
That’s Right, 10 years since the car was first
registered and on the road, where has the time gone?
I haven’t been keeping the site up to date very well,
probably because there’s a lot less to do on the car
than there was while she was being built. But
things have been done every now and again, as the diary
entries show.
So, what’s new for her 10-year birthday? Well 2013
saw me install a few modifications and start the install
a new heater, which eventually got finished and is
working. It’s a small heater so doesn’t put out a
huge amount of heat, but it’s better than nothing on a
chilly day.
Remote Oil Filter
The Oil filter and sump are very close to the ground and
with the useless zimmer-rides its jacked up as far as it
can go with about 2 inches of clearance; which isn’t a
whole lot when going over speed bumps. So I
invested in a take-off plate and remote filter kit.
It was fairly straight forward, apart from the faff
involved in getting u-bend unions! (why are the simple
things always the worst?). Still the take-off plate has
been fitted and the remote filter housing is bolted to
the side of the engine block [ photo ]. That leaves the sump
as the issue. But it’s already the shortened rover
version and I can’t find anyone who does any particular
tuning or customised parts for the Rover T16 engines so
no readily available dry sump kits out there; if anyone
knows of anywhere that might do it feel free to email me
:).
For now, I will have a look at fabricating a sump guard
of some sort, although I’m not sure what the anchor
points will be at the moment.
Suspension Replacement
That’s right, after moaning about the original Zeemer-rides
(or zimmerrides as they are known on the RHOCAR forum)
for sooooooo long it’s time to do something about them.
At the end of my last contract last August I decided it
was time to get some replacements. GBS are doing
suspension kits for pretty much the whole Robin Hood
range, so I gave them a call to see what was what.
The front wishbones needed a new bracket as would the
lower Sierra trailing arms on the rears, but GBS can do
the whole lot with 4 coil overs, rated for the Superspec
for just over £400, so they were duly ordered.
A week goes by and I get a call to tell me that GAZ have
a problem with their production line, so there will be a
delay of a few weeks, no worries I keep chilling out
then!
The kit eventually arrived October time and it was put
in the garage next to the car for a spare weekend…….and
pretty much forgotten about! What?! I know
it was a busy family time and then before you know it,
it’s Christmas.
So it’s now 2017 and the coil overs are still in the box
and the Road Tax is due soon so better start making
plans to get on with the shocks.
Decided to start with the fronts, thinking they would be
easier as they’re exposed and nothing really needs to be
removed. Great theory, but they were a pig to
remove, as the zimmers had seized and couldn’t be
unwound meaning they were under tension. But they
did come off in the end. New lower wish bone
brackets were already pre-drilled so only need painting
and bolting on. New Gaz’s were bolted in and the
springs wound to about half way and the ride adjustment
set to 10 clicks off of firm.
Dropped the car to the ground and check the clearance,
still only 2 inches, so wound the springs up a few more
turns and got to 2½ inches, which will do for now.
I can check again once the rears are done.
Rear zimmer’s came off with no trouble at all, the
rubber donuts were split and the shocks corroded a lot.
Not a quality item. The biggest issue with the
rears where the new bottom brackets, they were 3mm thick
and had the mounting holes drilled for the bottom of the
coil overs, but the bottom hole wasn’t drilled as this
would be pretty much customer positioning for each car.
Drilling a 12mm hole through 3mm steel was a very slow
job, took almost an hour each one.
There is virtually no room in the bottom recess on the
trailing arms so the bottom bolt that hold the bracket
to the arm needed to be welded on then painted up and
fitted to the bottom of the coil overs before fitting to
the car. The Coil overs were mounted at the top
and the trailing arm jacked up until the bracket bolt
was through the mounting point, before fully tightening
the bottom bolt you must make sure that the coil over
bolt is roughly in the same plane as the trailing arm
hinge; slightly diagonal going in from the outside.
Everything was tightened and then onto setting the ride
height. The new coil overs were shorter than the
old ones, even with the bottom bracket they were about
an inch shorter, so I wound up the spring so the coil
over was under tension while the car was off the ground.
Once on the ground it was obvious that it was a bit too
high, so 2½ turns off of the spring, tightened the
locking screw and back on the ground, 7 inches in front
of the rear wheel and a fraction over 2½ inches at the
sump.
Out for a test drive and she handles so much better, but
the ride was super stiff, so a few clicks off of the
rear and one off of the front and it feels much better,
although I think it may be tweaked a few more times, but
for now its done![ photo ]