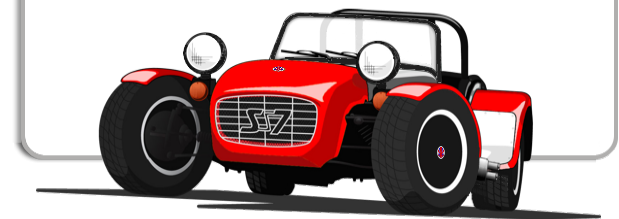
The 2012/13 Diary,
Well, 2011 and a chunk of 2012 was taken up totally by a change in life-style and career.
But the reality didn’t live up to the hype, so back to IT Consultancy etc, and hopefully more time
on the car; at least I don’t have a 600 mile round trip commute now :)
What would I like/need to do with the car after 6 years?
- I still want to replace those awful coil overs
- Finish the column switch swap out
- May need to look into the thrust bearings rattle at some point
- Sort out the heater issue (there isn’t a heater; that’s the issue)
- Replace the leaking screen washer bottle
- Get it MOT’d and back on the road
- Get to drive it more (it only has 3.5K on the clock)
Oct 2012 – Dec 2012
Column switches
I reported back in 2010 that I’d made new circuits for the mini stalks, the wiper circuit was
fine, but the flasher/lights circuit needed to be re-done. I’d originally intended to use a
latching relay to switch between dip and full beam, but after trying 3 of these units and none
of them worked properly in the circuit I had I gave up and decided that I’d try an alternative
approach. So I needed to make the column switch itself “latch” which is didn’t as the
original mini circuit board was all electronics.
So I fabricated a new internal mechanism that made the headlight control either temporary
flash or latch on (purely mechanical). It’s a very soft latch on, and hopefully is robust
enough as I don’t do a lot of night driving in the car. But because the original circuit was
designed to work with the latching relay I had to change the design and make a new circuit
board [
photo ].
Now that I had two working circuits and column switches came the "fitting them to the car" bit :)
I had to modify the steering column slightly to allow for the new stalk housing and I wanted to have an
auto turn signal cancel so I incorporated that too. Then it was onto making new brackets to slide into
the column fittings and hey-presto they fit [
photo ].
Now onto the electrics; originally there were no relays for the wiper circuit and I would now need some as
the circuit boards would not take that entire load. So I ripped out the relay board I had made during the
build and fabricated a new one to incorporate lights; side, dip and full, fogs, heater, slow wipe, fast
wipe and wash [ photo ].
Once that was installed it was a case of connecting the various components and making sure it
all worked, which it did :)
All that’s needed now is to modify the steering column cowling :(
Jan 2013 – Feb 2013
Demisters/Heater
While working on the column switches I discovered the demister units had packed up so I’d need
to replace them. If I was going to do that I might as well consider the heater issue at the
same time.
Originally when I built the car I had not fitted a heater; I’d assumed as it was only going to
be a fair weather car I wouldn’t need one. However as I’ve driven the thing in less than hot
conditions I have since learnt; yes I do need a heater!!
Pulled out the old demisters and wiring, added the wiring into the new relay and fuse box ready
and set to sourcing vents, ducting and ultimately a heater unit. The actual heater unit is going to wait
till funds are in a bit better shape as it is a luxury :) but I can crack on with the demister vents and
all the ducting.
I’ve spotted a great small heater unit from T7 Designs and they have some vents that are about the right
size. Once the vents arrived I realised that space inside the scuttle was very limited and had to fabricate
some angled mounts/channels for the under dash side of the vents [ photo ]. As the new vents weren’t
exactly the same size as the old units I needed to cover the gaps as it were, after much pondering I’ve
decided to cover the dash top in leather at the same time [ photo ].
The lack of space inside the scuttle is compounded by the fact that I retro-fitting the ducting; if I’d
done it at the time of the build it probably would have been tight, but easier. Oh- well! The heater unit
will have 2 outlets one for each side of the cabin, so I’ve needed to split each side into to 2 outlets;
demisters and cabin foot well [ photo ].
March 2013
Column Switches cont…
Column switches were now wired in and working, but the clearance between the steering wheel was compromised so I was
going to need to source a wheel spacer to move the wheel an inch or so away. The other issue was the horn contacts,
originally mounted onto the old stalks I would need to re-position them onto the new ones. I created a paper template
of the slipring and used this to position the new semi-eliptical contacts I'd made
[ photo ]. The contacts seem to work ok, so now it was
onto fitting the steering column cowl.
The original fit was of course around the supplied switches, which were on small square blocks, but the mini
stalks were on larger blocks with oval and rounded tops and they were further forward than the original ones
so that changed all the original points of reference. I measured from the ignition key, as this was about the
only thing that’s stayed in the same position and after a couple of “double checks” started to cut and reshape
the cowl.
The cowl was in two parts – the larger bottom part was reasonably unchanged part from enlarging the
cut-outs for the base of the stalks, but the top part was never going to fit over the top of the stalks as they
were too wide, so I sliced off the front to reuse and attached leather to cover the remaining area, this would also
allow the steering column rake adjuster to be used without leaving a gap :)
It didn’t take too long to complete and while it’s not as neat as the original installation had been it looks ok
[ photo ], well I think so anyway and here is
the wheel on to complete the look [ photo ]
although I now needed to sort out the spacing between the switches and the back of the wheel.
I spent a long time searching online for a wheel spacer that would work with the Mountney Classic wheel; there
isn’t one! It would seem the wheel like pretty much everything else supplied with the kit is an old fitment,
or in some cases discontinued. There are lots of Momo and Sparco compatible products with holes at 74mm pcd,
but nothing with the holes at 100mm like the Classic! So I next started to look for Boss adaptors, mine already
had the three hole to 6 hole adaptor so I figured that might be easier to find; WRONG! There was nothing doing
there either.
In the end I realised I was going to have to do a DIY job. I could get the space using three nuts between the boss
and the adaptor, but I was a bit worried about the lateral load that would go through the bolts at these three
touch points, with very little support. So I decided I needed to create a proper spacer that was the same diameter
as the adaptor with all the holes etc; that would spread the lateral load across the structure.
I didn’t have a lump of 1” think aluminium laying around but I did have a lot of cut offs a lot thinner, so armed
with an 80mm hole cutter I cut out 14x1mm thick aluminium discs and 2x4mm ones; then glue them all together with
ultra-strong epoxy.
I had to make a press and template to accurately drill all the holes required and to hold the layers in place while
the epoxy set [ photo ]. The layers were
glued and assembled onto the press and everything was bolted down and left under pressure for 24 hours
[ photo ]. Then I drilled all the holes and
when it came out of the press it looked like this [ photo ].
I did a trial fit to ensure clearance was going to be ok, which it was [ photo ]
and then it was a case of making good and completing the final fit, and here’s the result [ photo ].
At last the column switch replacement project was finished! It had thrown up a few unexpected issues, but they
were in, fitted, working and the steering wheel and column cowl modified to accommodate them – result! [ photo ].
April 2013
Washer bottle
I think I mentioned earlier that the windscreen washer bottle had sprung a leak and needed sorting, so that was
next on the job list for April. I sourced a replacement, but this time instead of going for a rigid bottle I went
for the soft washer bag type products; they take up less space and gave more options for location.
I relocated the washer bag to the side of the car on the driver’s side (opposite to the original installation),
fastening it along the top chassis bar of the engine bay and then tethering it down at the bottom to ensure no
swing while driving [ photo ]. Then I extended and re-routed both the wiring and washer tubing, connected them
and the installation was completed in under an hour, with no complications :)
See you later in the year!